backpackingblogGearGear listultralight backpacking

Snowy arctic paradise and gear failure hell

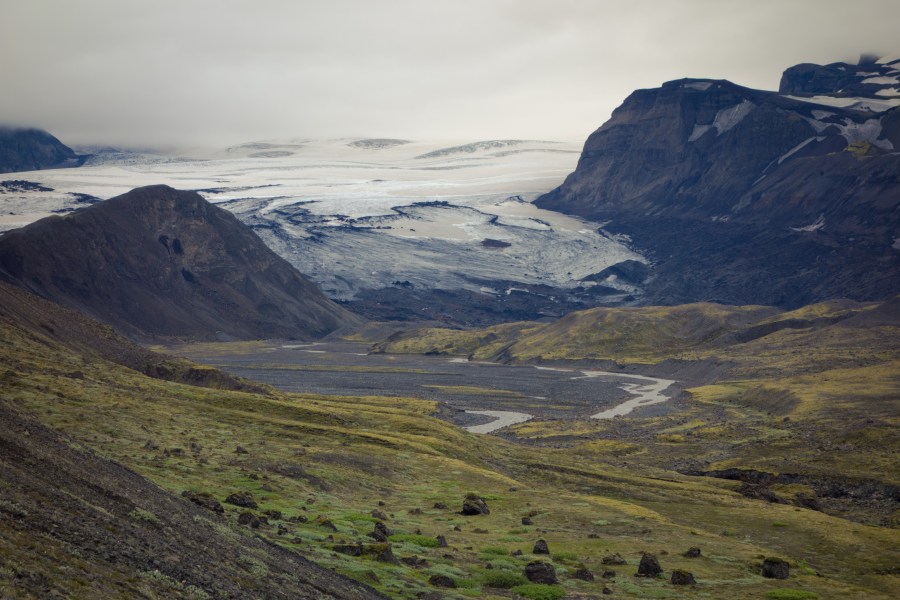
I felt the warmth on my face as the afternoon sun crept through the mountain ridges, my body hot from from the layers of winter clothing and the gore-tex jacket and pants keeping all the moisture in. My winter backpack weighing in at 11 kilos and well prepared for anything the cold winter night could throw my way. I had been longing for this moment for over 4 months, planning, preparing and daydreaming about this very scene, the skis under my feet, backpack on my back and the magnificent mountainous regions stretching as far as my eyes could see.

IMG_3835
I had planned everything in the minutest of details, nothing left to chance, this far out in the Swedish wilds in the middle of winter is nothing to take lightly. -20 degrees and fridged wind blowing through the valley, even the slightest mistake could lead to serious problems.

IMG_3836

IMG_3833

My skis, a pair of Madshus Glittertind backcountry skis are made for this kind of backcountry touring, my poles and my trusty ski boots all fitted and working in unison, propelling me across the harsh arctic landscape. A smile is stuck on my face, and sheer joy has taken over my consciousness. Then, from out of nowhere I hear a snap, suddenly my ski is off to the side of me, I lose my balance and fall, somewhat reluctantly, headfirst into a deep snow drift. Smile gone, joy replaced with pain, the pain of freezing wind blowing down onto my wet, cold face. ”Shit” I said, as I looked down, realizing the sole on my ski boot had separated from the boot itself.

IMG_8249

Sitting there, hands frozen, ears and toes starting to go numb, and tears dripping from my eyes because of the cold harsh wind, I knew I had a problem. 10 kilometers away from the nearest cottage, and now no skis to ride on. As I looked up, not too far away I spotted a small emergency wind shelter, strategically placed for just these kinds of incidents. I picked myself up and made my way to the shelter. I took off my ski boot and assessed the damage – the sole had almost completely come off from the rest of my boot. Not sure how to fix it, I did the only thing I could do, I wiped my boot clean, pulled out my duck tape and got to work.

IMG_7484.JPG

The patch job might not have been the best, but for fucks sake, it’s duck tape and I’m desperate. As the saying goes ”if you can’t fix it with duck tape, your not using enough”. After fixing my ski boot I had a decision to make: Stay here at the wind shelter for the night, or jump on my skis and hope I can make it back to my starting point and to safety before night fall. I sat in the shelter for a while longer, freezing, I decided it would be best to jump on my skis and make a go for it.

I learned some very important lessons this day: 1. Duck tape doesn’t hold in freezing cold and 2. If one boot breaks, there is a high possibility the other will follow suit.

After less than two kilometers into my 10 kilometer journey both the silver tape and my only working boot broke. 8 kilometers back to safety, night fall in an hour and I was starting to prefer the warmth of a house and bed to my current predicament.

Now balancing on two cross country skis I made my way painstakingly slow and wet (I fell, a lot). I couldn’t help but see myself in an episode of some Bear Grylls survival show, fantasizing about how I might have to eat tree bark and drink my own piss to survive. Or perhaps I would be like one of those Vietnam blokes that during the war sought refuge in the jungles only to come out 40 years later to a whole new world. Yes, these are the fantasies that kept my mind occupied during this cold journey back to safety. Finally, after deep in fantasy about how king Gustav Vasa must have felt this way when he skied 90 kilometers on one ski in the 1600s to get away from an invading army, finally, I crossed the marker I had been waiting for, and not too soon either. The 2 kilometer marker.

Now both my soles have come completely off, there was simply no possibility for me to even balance on my skis anymore. So I took my skis off, strapped them on my HMG sidewinder, took my ski boots off and hiked the remaining distance in knee high snow. It was cold, but exhilarating, my adrenaline pumping hard kept my feet and body warm.

IMG_9900
This is the story of my 4 day trip in the frozen backcountry of Jämtland in northern Sweden. The 4 day trip that ended up being just one day because of one fateful decision I made the week prior: Namely, the choice not to buy new ski boots when I knew the ones I had were starting to get worse of the wear. I knew I probably should have, I knew it in advance, I had even looked at a few but opted to wait until next season, thinking I could get one more out of the boots I had. To say this story could have ended much much worse is an understatement. No cell communications, no GPS phone with me, and the particular route I chose was the complete opposite of the one I had left with my wife – for really spontaneous reasons.

With that said, I had a great time, I learned a lot and I can laugh about it now. So heres my suggestion – when it comes to winter camping, don’t be stupid.

My gear for the trip:

Item Ounces Grams
Packing
Thermarest Pillow Sheet 1.9 54
Black Pillow Case Holder 1.5 43
Red 2l Pack Bag 0.7 21
Hmg Sidewinder 4400 34.2 970
Shelter
Msr Winter Stake 0.8 22
Hilleberg Enan 38.8 1100
Sleep
Montbell Ul Pillow 2.6 73
Enlightened Equipment Quilt 22.9 650
Pee Bottle 0.5 15
Xtherm 20.5 580
Ee 30 Syntheic 28.1 798
Cooking
Sea To Summit Long Spoon Ti 0.4 12
Zefa Water Bottle 3.5 98
Marches 0.4 11
Feet Warmer Water Bottle 0.4 10
Evernew Flatpot W Lid 4.8 136
Clothing
Western Mountaineering Booties 4 114
Wp 200g Pants 6.1 174
Haglofs Green Wind Jacket 2.3 65
Kristal Ul Gator 3.2 92
As Tucas Red Beanie 1.8 52
Montbell Puffy Pants 16.8 475
Haglofs Black Layer 2 Sweater 14.3 405
Wp Thick Socks 2.9 81
Hestra Mittens 8 226
Wm Flight Jacket Xl 13 368
Haglifs Lim Puffy Jacket 6.7 191
Other
Murla Knife 0.7 20
Candle Lantern 6 170
Ul Teeth Care 3.1 89
Bd Headlamp 3.6 101
Iphone 6s Plus Ink Case 9.9 282
Msr Towel 1.2 35
First Aid Kit 3.1 89
Usb Cables 0.8 24
Snowclaw 5.9 168
Fuji X-t1 Body 16.1 456
Fuji Samyang 12mm 10.4 294
Fuji 18-55 11 311
Fuji Battery 1.6 46
Fuji Battery 1.6 46
13000 Battery Pack 12.3 348
Worn
Black Beenie 1.2 35
Aklima Hoody Wool 13.3 377
Black Shell Pants 25.3 717
Salomon Goretex Orange Shell 870 31 879
Puma Winter Running Tights 9.4 267
Fleece Mittens Bula 2.5 70
As Lucas Ul Pants 2.3 64
Consumables
Butane Cannister Small 7.1 202
Food For A Day 26.5 750
Toilet Papper 5.3 150
Total 423.1 11993
backpacking recipe

Potato bark – Trail food magic

Bark is more awesome than it actually sounds. It’s the yen to trail food yang. It’s what separates the gourmet backpacking geniuses from the top ramen amateurs. I will be doing a lot of different trail bark recipes, but I will start with potato bark as it works as both trail chips and mashed potatoes. Energy rich and easy to make that adds a whole lot of taste!

Ingredients:
2 lbs potatos – peeled. (1 kilo)
fat free broth – I use vegetable broth and about 1/3 cupSalt and pepper

Prepartion:
skin the potatos and cook in a casserole for about 15-20 minutes until soft. Then drain and add vegetable broth, salt and pepper. Then mash the potatos – I use a hand mixer to mix it all. For variations you can add barbeque sauce and garlic powder.

dscf3140dscf3148

Dehydrate:
Once all the ingredients are mixed your ready to spread the mix out on a paralexx sheet or baking paper. Be sure to spread relatively evenly over the entire sheet. This recipe and the 2 lbs of potatos is just right for the 15″ x  15″ Excalibur dehydrator.

dscf3151

135degrees for about 10 hours should be more than enough to make nice crispy potato bark!

dscf3176

I will add recipes to use the Potato bark on in my next post!

backpackingessentialsGearGoing Lighterultralight

The UL Jacket – Essential gear for any backpacker

I once wrote an article a long time ago about the ultralight wind jacket and how I felt it was the single most important piece of gear for any backpacking regardless of your weight preferences. (Whether you enjoy ultralight or prefer being heavy and miserable.. ) I would like to propose that the second piece of essential gear for any backpacker would be an ultralight down jacket (synthetic works as well but usually heavier for the same warmth). For the last 3 years I have been using a lightweight down jacket that weighs at around 180grams for the XL size. (Haglöfs L.I.M essens down). I find this jacket much like the wind jacket allows me to leave a few extra layers at home. And the down jacket combined with a wind jacket is hard to beat in weight to warmth ratio.

unnamed

When I talk about ul down jacket I mean any down jacket under 200grams for a large size.

My typical three season layer scheme looks something like this:

Wool or bamboo fiber Shirt 150grams – main layer always on

Windjacket with hood 80grams – Always with me and depending on weather usually always on (in the nordic regions of the world)

Down jacket 188grams – I usually put my down jacket on the minute I stop for the day. It’s very rare that I actually need this while hiking.

Total weight: 418grams or about 1 lbs.

That’s it. That’s my entire upper layering system for most three season hikes. If it’s raining I put my rain jacket on (so fourth layer). And depending on how long I am gone I usually don’t bother with a an extra shirt to sleep in, unless I will be hiking in wet and cold regions. Also, as you can see, I don’t bother with sweaters or thicker shirts or anything else that usually becomes redundant and heavy when you have a light down or synthetic jacket. Most sweaters, wool or otherwise, are going to be heavier than a down jacket and won’t be anywhere near as warm.

This setup will easily keep me warm to down around 30 degrees farenheit. So even on cold nights when the temperature will drop to 20 degrees, I can keep warm and snug at night in my three season gear (quilt, sleeping pad and down jacket).

As with any high quality UL product, lighter usually means more expensive, but there are always exceptions to this rule. However no-matter what, your never going to get into silly money prices that you could end up paying for when purchasing main stream products that weigh much more. If you inclined to do so, there are a few MYOG patterns and kits for synthetic and even down UL jackets. When my current jacket breaks down I will probably replace it with a synthetic jacket. Main reason being that I use this same setup even in the winter with the inclusion of a thick down puffy, which creates more moisture, and that breaks down my inner down. So, a synthetic would fix this problem.

Ultralight Down and Synthetic jackets:
Haglöfs L.I.M Essens down
Western Mountaineering Flash jacket
Yeti streto ultralight down
Crux turbo top
Mountain Hardware ghost whisperer
Mountain hardware Micro Thermostatic (synthetic)
OMM Rotor smock (synthetic)

These are just a few of the ul jackets currently available as of this writing.

If your interested in sewing your own:

The kinsman insulated pullover is the best design I’ve found

http://thru-hiker.com/kits/kinsman_kit.php

backpacking recipe

Making Ghee

There are different reasons why one should want to make ghee. For me I use it both at home and on the trail. It holds alot better than butter does and I just like the taste.

Tools needed:
Casserole
Spoon
Strainer

Ingredients:
1/2 cup butter (depending on how much you want)

Preparation:
Place the butter in a casserole and heat up

dscf3058

Once the butter is completely melted you will start to see the milk protein bubbling up to the surface.

dscf3069

Just scoop the milk protein out with a strainer

dscf3079

Continue to do this until all the milk protien is out.. this takes about 5-10 minutes total


dscf3085Once all the protein is filtered out the ghee has a nice yellow look to it. You can then pour this liquid into a jar directly or run it through the filter once more.

dscf3089

Once the ghee is done place it in a jar at give it some time to settle. Usually takes about a day to completely settle.

backpackingblogDestinationsLandscape photographylaugavegur

Trip report: The Laugavegur trail day 4

Emstrur (Botnar) to Þórsmörk

— 15 km, estimated walking time 6-7 hrs, 300m net descent —

dsc07873

Again, I was left breathless by the amazing hike. Glaciers, desert, rivers, mountains and forest all within a 15 kilometer hike. This day starts off in the canyon of Syðri – Emstruá. Here there is a steep path that leads a bridge that runs over the glacier river.

dsc07895

There is something epic about a raging river being fed with a glacier.. simply amazing. I sat here for sometime and ate my breakfast and just enjoyed the incredible view, engrossing my soul completely in the moment.

dsc07894

I learned along this trail that it was time to replace my beloved Haglöfs LIM trail shoes. I decided from this moment on that I would wear trail shoes that had toe protection and better grip. On top of that I realized that I’m not really into video production.. I shot hours and hours of video along this trail and so far haven’t edited anything.. I prefer working with photography.

dsc07910-pano

After this long trek along the sandy, volcanic ash desert everything changes to a kind of mini forest.

dsc07932

dsc07949

This little house just seemed lost in the wilderness – It was the first house I’d seen for days.

dsc07951

The house from a little further out.

dsc07967

dsc07986

After a long walk came this amazing water crossing along the Þröngá river. As always the water is freezing cold, but barely knee high throughout so wading is no problem.

dsc07992
The little village at the bottom of the valley is Porsmork, while I will be staying in Bazar, I wanted to make the little 8 kilometer detour to Porsmork to drink beer and eat peanuts. It was worth the walk. You can even take the bus back to Reykjavik from Porsmork.


From Porsmork I made my way on to Bazar where I would be sleeping for the night.

dsc08015

While this was not Bazar, it was nice nonetheless.. Not really sure what this place was called, but it was nessled between Porsmork and Bazar.

dsc08023

After a quick walk over this glacier river, I soon arrived in Bazar where I would throw up my tent and make camp for the night

Once my tent was setup I made my way to the river, laid down and chilled out for a few hours before heading off to bed. Once again, the Laugavegur trail delivered on it’s incredible views and serene enviroment.

dsc08062

Trail report: the Laugavegur trail day 1
Trail report: the Laugavegur trail day 2
Trail report: the Laugavegur trail day 3
Trail report: the Laugavegur trail day 4
Trail report: the Laugavegur trail day 5

blogDestinationsLandscape photographylaugavegurultralight backpacking

Trip report: The Laugavegur trail day 3

Alftavatn to Emstrur (Botnar)

15 km, estimated walking time 6-7 hrs, 40 m net descent

I was in no rush to leave Alftavatn, the views were simply incredible and it was nice to just hang out for a while. I knew that walking through this valley would be an amazing adventure, and with that, I laced up my trail runners and made my way towards Emstrur.

dsc07717

From the very start on the way to Emstrur, this incredible view is what I was met with. The hike from Alftavatn to Emstrur is by far the most picturesque of all the sections. From this kinds of green rolling landscapes, into long deserts of volcanic ash and a massive glacier looming in the distance like a constant reminder of the true wild that you are in.
This hike felt long, maybe it was the deep ash or the several large river crossings.. who knows, the hike is easy, but feels much longer than the 15km that it actually is.

dsc07722

The first real water crossing is about 3-4 kilometers from Alftavatn. Here I passed a whole group of heavy-miserables while they stopped to take of their boots and socks 🙂 I just trugded through, admittedly the water was cold but I warmed up quickly.

dsc07736

Here the trail takes us over the low ridge Brattháls into Hvanngil. If your looking to book a room in advance in Alftavatn and it’s fully booked (not unlikely). Check out Hvanngil, as it’s not always a known campground.

dsc07752

The first real river crossing is made on this part of the trail. It’s wide and irratic, you will have to walk around a while along the river Blafjallakvisl until you find a very wide part, and there crossing shouldn’t be a problem. You will notice however I stopped on a little sandbank in the river. I didn’t actually stop here to take a pic, to be honest I stopped here because my feet felt frozen solid from the ice cold water..

dsc07777

To say that the views along this part of the trail are amazing is an understatement. While I always find nature to be awe-inspiring, this particular part of the trail was something altogether different. I had the feeling of walking along the art gallery of god – his best pieces of art all laid out along a 15 mile trek. I took my time here, stopped often and forgot about everything else in the world, nothing mattered, I was lost in the moment and it was one of the greatest moments of my life.

dsc07787

dsc07788

dsc07798

After a while we come along the river Nyrðri Emstruá, which thankfully is bridged.. From here it’s only a few kilometers left before reaching the campground at Botnar.

dsc07773


DSC07809

After an incredible walk we come in towards Botnar which resides in the Markarfljótsgljúfur canyon with the glacier in the background.

dsc07818

The campground in Botnar is well protected from the heavy winds blowing down from the glacier. The views are incredible here and there is even a little shop here if you need some resuplies. 3G works perfectly fine along all the campgrounds throughout the Laugavegur trail – so calling home wont be a problem.


Trip report: laugavegur trail day 1
Trip report: laugavegur trail day 2
Trip report: laugavegur trail day 3
Trip report: laugavegur trail day 4
Trip report: laugavegur trail day 5

DestinationsLandscape photographylaugavegurPhotographyTrip report

Trip report: The Laugavegur trail day 2

When volcanic desert transforms into a true paradise on earth

Hrafntinnusker to Álftavatn – 12 kilometer from volcano to paradise

DSC07449.jpg

After a day and a half of hiking in rain and cold, finally some sunshine and water. I stopped here and filled up my water bottle, ate an energy bar and called home. This really lifted my spirits.

After what felt like an eternity of walking in rain and snow, after volcanic ash, rock and gravel. A long sleepless night in an unprotected snowy volcanic wasteland.

dsc07467

The Laugavegagur trail transformed itself into a true paradise on earth when I came up over the ridge and looked out upon Alftavatn.

dsc07478-pano

Alftavatn is where most pictures you see of the trail come from, and in the next section you will see why. However to get there you have to walk along a desert wasteland for almost the entirety of the 12 kilometers from Hraftinnusker.

dsc07497
My journey to Alftavatn started after a cold night of “sleep”. On top of that I of course only use trail running shoes. While this is normally never a problem, on this one occasion my feet where frozen until I got my temperature up as the first 5 kilometers of the trail was covered in mushy snow.

dsc07528
It took me about 6 hours to get to Alftavatn from Hraftinnusker, lets just say I was in no hurry at all. While it was cold, wet and at times just all around shitty, I actually enjoyed this part of the trail immensely; granted, more now when I’m sitting at home writing this book.

dsc07601

While the campground looked lovely, I opted for the cabin.. there was actually an available bed! The room here will cost about $50.00.. to me it was worth it that night.

dsc07543

Trip report: The Laugavegur trail day 1
Trip report: The Laugavegur trail day 2
Trip report: The Laugavegur trail day 3
Trip report: The Laugavegur trail day 4
Trip report: The Laugavegur trail day 5

backpackingblogLandscape photographylaugavegurPhotography

The Laugavegur trail day 1

Sometimes it takes me a while to finally get around to doing a trip report. I am working on this as an ebook instead as I can really get the pictures and album to flow better, but I will post the separate days here nonetheless.

This will be a full trip report and information guide for anybody wanting to do the trip themselves. This trip report is divided into 5 days simply because of the diversity and vassness of this trail I simply couldn’t fit it all into one post.

The Adventure begins

I had booked my flight a few months in advance to Reykjavik from Stockholm. The total flight cost around $350 round trip and the light takes about 3 hours. So, in other words Iceland is an obvious choice for most Swedes. I Arrived at Reykjavik international airport and immidiately outside the little airport I found my bus to Reykjavik city center.

dsc07392-2

Once at the city center I took a little walk into Reykjavik center ate a burger, bought a map and some gas for my laugavegur trail hike. There is a gas station about 100 meters away from the bus station where all these supplies can be bought. My bus would be leaving at 13.00 so I had a few hours to spare before heading off to the trail start.

I arrived in Reykjavik at around 10.00 a.m. Finding my way around the airport was a rather straight forward process as there really is only two busses to chose from. I bought my ticket at the BSI desk to the BSI terminal in Reykjavik. After about a 40 minute ride I found myself at the main buss terminal. From here it was just a simple manner of purchasing the “hikers pass” which would get me to either the start in the north at Landmannalaugar or in the south at Porsmork or Skogar and back to Reykjavik.

I decided I really wanted to start north and head south, seemed like a fun way to go to end my journey at the ocean. I’m glad I did as I found the first days along Landamannalaugar and Hrafntinnusker to be rather bleak with the rain and snow.

dsc07397
The Bus ride from Reykjavik takes about 3 and a half hours and I would definitely not recommend trying to hitch hike to the start as there it is literally out in the middle of nowhere. Nobody drives that trail unless they are hiking – and that is mainly just the buses. When I arrived in Landmannalaugar it was rainy and cold. Everyone was bunched into the toilets trying to figure out what they want to do.. Walk or pitch their tents. I also had a difficult time deciding as it was raining like crazy and it was by this time 4 p.m in the afternoon. However, as I had been sitting since my flight left Stockholm, my ass and back were hurting so I opted to walk.

The Hike from Landmannalaugar to Hrafntinnusker is about 12km and takes around 4-5 hours to walk. While it was late, I really just needed to walk. This part of the trail was marked by snow, rain and steaming volcanic hills. Landmannalaugar is the only part along the trail where you can swim in the hot springs. I probably should have stayed, but I couldn’t be bothered to sit still any longer.

And so, I made my way to look over the hotsprings, looked at all the hikers huddled in the toilets, waved and made my way.

dsc07401

Landmannalaugar to Hrafntinnusker

12 kilometers – takes about 4-5 hours to walk

This part of the trail from Landmannalaugar to Hrafntinnusker was cold and wet the whole way. I was happy for it to be done. When I do this trail again it will be in August and not June, the trial in June is very wet, snowy and sometimes this means we just want to get through it all instead of taking time to enjoy every second.

dsc07403

The first day was wet, cold and rainy with dashes of snow. With that said, the beauty was there.

dsc07413

There was quite a few people stopping me along this part of the trail asking “how far is camp..” I seemed to be the only one heading south!

DSC07417.jpg

The warmth of the volcano underneath kept the ground nice and toasty.

dsc07421

dsc07442

By the end of this first day I had reached my limits. A long night before when I didn’t get any sleep, a flight, a long bus ride, never ending rain and cold. I was so tired that I didn’t bother taking pictures from that first camp at Hrafntinnusker. In my opinion the campsite wasn’t the best as it was surrounded by snow and no wind protection. I really wanted a warm bed in the cabin, but alas it was fully booked.

dsc07444

Trip report: The Laugavegur trail day 1
Trip report: The Laugavegur trail day 2
Trip report: The Laugavegur trail day 3
Trip report: The Laugavegur trail day 4
Trip report: The Laugavegur trail day 5


hobbiesLiving simplyminimalismminimalistsimplicity

Minimalism and hobbies?

This one is difficult for me. To be honest, I have had many, many hobbies and I don’t mind buying stuff for my different hobbies. One major change I have made since becoming minimalist is limiting the amount of hobbies that I have. In fact, I am now working towards one hobby at a time with perhaps a longer life than my previous adventures. So instead of me having 5 different completely separate hobbies that I go at about 150% for 2 months at a time, I now try to limit myself to just one hobby that might have a few offshoots but still part of the whole.

An example of this would be do I choose photography or working on cars? While photography can certainly be a lone hobby, it tends to work well with my other hobby of backpacking. So cars will have to go. What more can be incorporated into my backpacking hobby? Photography, recipes (making food for the trail), traveling in general, writing and even MYOG (make own gear). However, if I were to pursue all of these separately with 100% focus they would be too large and expensive to accommodate for any other hobbies. Read More

backpackingplanningsarektrip planningultralight backpacking

Planning for a walk across Sarek

It’s time for me to start committing to this years (2017!?!) trips.. While I have a couple of smaller 4-5 day trips coming up, winter adventure and a week in the USA. The big trip coming up for me this year is a trek across, perhaps zig zagging through Sarek here in northern Sweden above the arctic circle. Often called Europes last wilderness area… Don’t know if that is true but in any case I really love hiking these northern regions of Sweden.

I like to buy my tickets early to wherever I plan on hiking. In this case I plan on buying my tickets during the week. By doing this I am mentally committing to a trip. Most the time if somebody wants to join along, its no problem to buy tickets for them later on. It also gives me something to look forward to.


DSC07830

When

I am looking at making this trek towards the end of July and through the beginning of August. I will be leaving Stockholm on the 27th of July and ending around the 7th or 8th of august. I am choosing these dates more for logistical reasons than anything else – I have a wedding to attend in Umeå (northern Sweden) on August 12th and I suspect my wife would prefer I joined her for that wedding. Coming late July also has the added benefit of being a littler drier… hopefully. This area is known for being wet, cold and it’s not usual to be snowing even in August.

Getting there:

I will be starting by Stora Sjöfallet – the northern section of Sarek national park. I was originally planning on starting in Ritsem but decided to save that for another trip. So my planning is a little ”spartan” at the moment as the official timetable isn’t released yet. But it’s all good, I’m fairly confident in my knowledge of Sweden and getting around. I will be flying into Gällivare with Nextjet.se from Stockholm and arrive at around 11.45. The bus line 93 to Stora Sjöfallet goes once a day at 8.55 in the morning. That means a night in Gällivare which gives me time to walk into town and buy Gas or Alcohol for my stove depending on which I bring. No matter if I decide to change my start to Ritsem or not, it’s the same plans and bus so I can still buy my plane ticket to Gällivare and book my hotel for the night.

How far:

I am looking at being away 9-13 days, I want to keep flexibility as an option as I don’t really feel like walking 40 kilometers a day. This trip I plan to keep my mileage rather small, somewhere between 10-20 a day as I want to make time to zig zag, climb mountains, take photos and cook nice meals. A slow, lovely walk through Europes last wild land. Total I am looking at moving about 100 -130 kilometers during this trip. It really depends on where I decide to start.

Where to start:

I want to walk north to south. No real reason for this, but I guess it’s a psychological thing. In either case I will start in either Stora sjöfallet or Ritsem. The bus line is the same 93 from Gällivare. I either hop of the bus at Stora sjöfallet at 11.00 or at Ritsem 13.05. It’s really a case of how long I want to sit on a bus and what I want to see. The important part is making all the preparations around.

Bus line 93 from Gällivare timetable http://www.ltnbd.se/tidtabeller/31/0/

The Trek:

While still unclear exactly where I want to start, I do know where I want to finish. Kvikkjokk in the southern part of Sarek national park. I also know that the bus from Kvikkjokk leaves once a day at 9.00 in the morning. But perhaps this will change as we start getting closer.

In any case my preliminary trek looks something like this starting in Stora sjöfallet (on the right) or Ritsem on the left.

Here with a start in Store sjöfallet

And ending in Kvikkjokk

This particular trek is about 110 kilometers. If I start in Ritsem and cross over my trek will be about 130 kilometers. While this could easily be done in just a few days, I really have no rush here.

Getting home

To be honest I don’t stress too much about getting home. With my trek ending in Kvikkjokk I know there is one bus that leaves everyday at 9.00 in the morning from the kvikkjokk church. Though this could change and maybe there will be another bus later in the day during the high season.

The actual timetable http://www.ltnbd.se/timetables/61/0/ – bus line 47 to Jokkmokk or 94 to Murjek train station and from there I will be taking the train to Umeå.

5.20 for bus 47 to Jokkmokk or 9.00 to Murjek…

Gear and supplies

10 days of food and gas/alcohol. I like to eat three times a day and have snacks in between. I don’t mind cold breakfast but I will still boil water for coffee. My food usually averages 650-750 grams a day for everything. One small gas canister should be adequate, but I will bring two as I plan on doing some proper meal cooking for a book project I’m working on.

Full preliminary gear list:

Item Ounces Grams
Packing
Hmg Sidewinder 4400 34.2 970
Red 2l Pack Bag 0.7 21
Red 4l Pack Bag 0.9 25
Green Pack Sack 4l 1.1 30
Shelter
Hilleberg Enan 38  1100
Ti Tent Pegs 3.5 98
Sleep
Thermarest Pump 2.6 73
Montbell Ul Pillow 2.6 73
Enlightened Equipment Quilt 22.9 650
Xlite Thermarest 15.6 443
Cooking
Sea To Summit Long Spoon Ti 0.4 12
Sawyer Water Filter W/ Bag 3.4 96
Jetboil Ti Sol 8.6 245
Clothing
Mld Waterproof Gloves 1.6 46
Haglofs Green Wind Jacket 2.3 65
Headnet 0.9 26
As Tucas Red Beanie 1.8 52
Grey Patagontia Shirt 4.8 137
Haglifs Lim Puffy Jacket 6.7 191
Wp 200g Pants 6.1 174
Ula Silnylon Rain Skirt 3.1 87
Patagonia Alpine Rain Shell 6.4 181
Other
Murla Knife 0.7 20
Ul Teeth Care 3.1 89
Iphone 6s Plus Ink Case 9.9 282
13000 Battery Pack 12.3 348
First Aid Kit 3.1 89
Usb Cables 0.8 24
Ul Tripod 3.1 88
Thermarest Repair Kit 0.5 14
Msr Towel 1.2 35
Delorme Inreach (rent) 7.1 200
Fuji X-t1 Body 16.1 456
Fuji 18-55 11 311
Fuji Samyang 12mm 10.4 294
Fuji Battery 1.6 46
Fuji Battery 1.6 46
Fuji Battery 1.6 46
Worn
Aklima Hoody Wool 13.3 377
As Lucas Ul Pants 2.3 64
Haglofs Grey Zip Hiking Pants 10.8 307
Bd Distance Carbon Sticks Pair 12.8 363
Merrell Allout Terra Trail Shoes Pair 23.5 665
Suunto Ambit 2.8 78
Fleece Mittens Bula 2.5 70
Consumables
Food For A Day 26.5 750
Toilet Papper 5.3 150
Coffee 3.5 100
Food For A Day 26.5 750
Butane Cannister Small 7.1 202
Total ex consumables 253.1 7183
Total 514.6 14587

As you can see it’s a bit heavier than my normal trips. There are different reasons for this – one is a heavier camera. Two, a heavier backpack as I plan to use the HMG Sidewinder 4400 and a lot more food. Also a different tent. But in all honesty, the weight difference on the whole is minimal.

An example of this is my MLD Duomid. If we look past the size and comfort ratio we can compare the actual weight gained and or saved

MLD Duomid with stuff sack 753grams
Tyveks Groundsheet 130grams

No innertent. Total weight savings comes out to about 200 grams if I bring my Duomid instead of Enan.

Where I lose the most weight in on my backpack, going with full rain gear instead of just a poncho/groundsheet and bringing my full camera gear instead of the sony RX100. I could of course change my mind on any of these choices by the time I take off…

15894562_1636878956606718_2471117077046148580_n

Want to join me?

Drop me a line – you see the plans, times and dates here and if your coming from outside of Sweden I can help with a bit of the planning as well. I always love backpacking with like minded adventurers. I will be carrying a little heavier gear as I am working on a few book projects, so I won’t be crushing 40 kilometers a day and instead around 15-20 with a few day treks to mountain tops to take photographs.