Category: Photography

blogGearGear listGear reviewsGröna Bandet

Tips for Hiking the Gröna Bandet: Beatrice Lundbergs Experience

In this interview, Beatrice Lundberg shares her incredible journey hiking the Gröna Bandet, a 1300 km trail through Sweden’s stunning mountain chain. She talks about her challenges, preparation, memorable moments, and the lessons she learned along the way. Whether you’re an experienced hiker or just dreaming of your own adventure, Beatrice’s story is sure to inspire.

Beatrice enjoying a breathtaking view with her trusted choice of gear: the Lundhags Padje Light 60L backpack, purchased from Backpackinglight.se

Who are you, and how would you describe yourself as a hiker?
I was born and raised in Piteå, with a great love for nature, especially the forest close to home. As a child, I spent a lot of time playing in the woods or accompanying my dad and grandfather on forestry work. I’ve always been intrigued by climbing mountains, but my interest in hiking developed during adulthood. Today, I’d describe myself as a “fast-slow” hiker; I like to walk at a brisk pace but also love taking long breaks to fully immerse myself in the nature around me.

What was your biggest challenge during the Gröna Bandet, and how did you handle it?
My biggest challenge during the Gröna Bandet was probably the weather on the day I hiked from Klimpfjäll to Raukaselet via Slipsiken. The wind was extremely strong, and rain lashed sideways across the mountains. I leaned heavily into the wind as I walked, and it was the first and only time during the hike that I felt at risk of getting hypothermic. My goal was to reach Slipsikstugan, a hut about nine kilometers from Klimpfjäll. When I finally got there, I was cold and soaked, but I was able to make a fire, warm up, dry off, and take a long lunch break while the storm raged outside. I had company from a few other hikers, and we talked about staying overnight. However, as the wind and rain began to subside, I decided to continue after some rest and made it safely off the mountain six kilometers from the hut.

Which part of the route was the most memorable, and why?
It’s incredibly hard to pick one specific section because I experienced and look back on the whole journey as a unified adventure. But if I had to choose, I’d say the first part of the Gröna Bandet, from Treriksröset to Abisko, was the most memorable. The weather was absolutely stunning, the scenery was breathtaking, and the infrastructure along that part of the Nordkalottleden was excellent. It was also great fun to share that section with my partner. Reaching Abisko was a significant milestone for me—it felt surreal that I had managed to hike there from the far north! That stretch set the tone for the journey and made continuing southward both possible and exciting.

How did you prepare physically and mentally for the hike?
I trained both cardio and strength during the winter and spring. The cross-country skiing season really helped improve my base fitness. I also went on a few shorter trips with my gear during spring to get used to carrying and handling it, as well as to evaluate if I wanted to make any changes before setting out. I also tried to walk more in my daily life instead of biking to places. Mentally, I thought a lot about how I’d handle being alone and deal with potential challenges along the way. These reflections were practically useful and also helped me show kindness to myself during the hike.

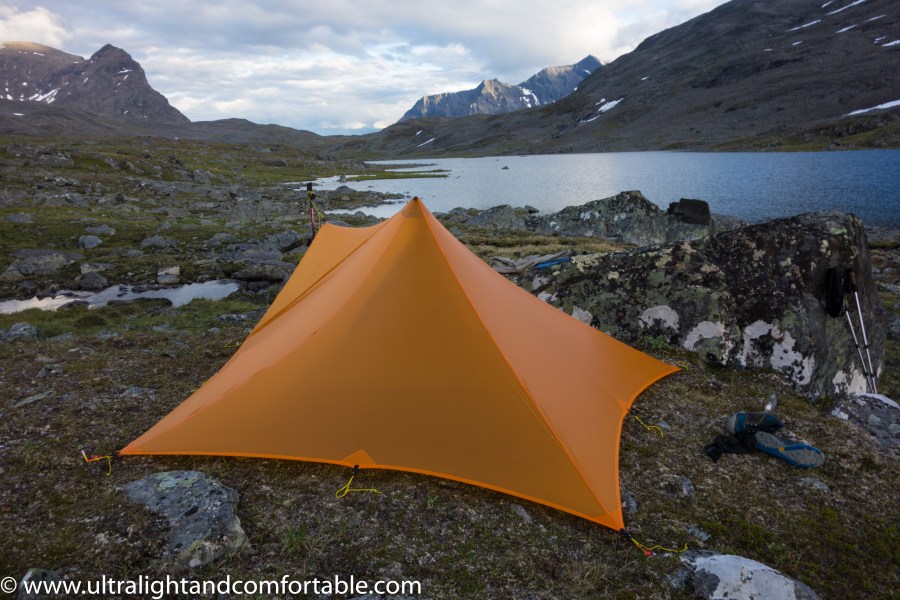
What gear was the most valuable for you, and what would you leave behind next time?
On chilly evenings, my Rab Xenon Jacket was incredibly valuable. Another standout item was my Kula Cloth—it worked perfectly and is a great tip for anyone peeing outdoors without needing to carry toilet paper. I also brought a CuloClean bidet, but I never ended up using it, so I’d leave that behind next time.

How did you manage food and water along the way?
I dried my own food for about half of the hike and shipped it to resupply points in Abisko, Ritsem, and Ammarnäs. For the rest of the hike, I bought food as I went, usually enough for three to five days at a time. This worked really well for me since I passed more small shops and stores the farther south I went. I drank water directly from streams between Treriksröset and Ammarnäs. South of Ammarnäs, I used a water filter, which I was very grateful to have on several occasions.

Were there moments when you considered quitting, and what made you keep going?
There wasn’t a single moment when I seriously considered quitting. However, my motivation wavered the day I left Hemavan heading south. I had just parted ways with two friends who had joined me from Ammarnäs to Hemavan, and those days had been so wonderful after hiking alone for a while. Saying goodbye was tough, and the weather forecast promised terrible conditions for the coming week. On top of that, I had a long day of road walking ahead of me. I started questioning what I was doing and why. What kept me going was primarily a sense of respect for myself and my dream of completing the Gröna Bandet.

How did this hike affect your view of nature and outdoor life?
My perspective on Sweden’s nature has broadened significantly after seeing the entire mountain range with my own eyes. It was fascinating to slowly experience how the high peaks of the north transitioned into the rolling open landscapes farther south. Returning to my regular life in a mid-sized city, with all its noise, light, and constant stimuli, was surprisingly challenging after having nature as my everyday environment for 55 days. Strangely, I feel more distant from nature now than I did before hiking the Gröna Bandet. Regarding outdoor life, the hike made me deeply grateful for the infrastructure, volunteers, and dedicated people who make Sweden’s rich outdoor culture possible.

What do you wish you had known before starting the Gröna Bandet that would have made the journey easier?
I wish I had known how long my daily hiking distances would be. That knowledge would have allowed me to relax a bit more at times since I actually had much more time than I initially thought to reach Grövelsjön.

How did the weather shape your experience, and how did you prepare for different conditions?
The weather influenced my experience every single day! Sunny days often felt lighter and more energizing. I would often take breaks and enjoy the surroundings, and everything seemed to go smoothly without much effort. Of course, sunny weather required extra care to avoid sunburn, so sunglasses, a cap, and SPF 50 sunscreen were my best friends. Rainy days required more mental grit and planning to get through but had their charm—for example, choosing to sleep indoors and warm up by a fire after a wet day. Before the hike, I prepared in several ways. I brought a wind jacket, rain jacket, rain pants, and waterproof socks. My sleeping bag and a change of clothes were stored in a sturdier waterproof bag, along with my electronics. The rest of my gear was packed in other dry bags, and I used a liner bag inside my backpack instead of a rain cover. During the hike, I consumed weather reports like never before!

Beatrice tent, a Hilleberg Niak

What advice would you give to someone considering hiking the Gröna Bandet?
You can find many great tips about the Gröna Bandet from other hikers online—this was invaluable for me during the planning stage! But don’t overthink it or worry if you haven’t spent ages preparing—adventure is out there waiting for you, and you’ll figure out a lot along the way!

If you’d like to see my packing list, you can find it here on Lighterpack: https://lighterpack.com/r/ynl25l.

If you’re interested in hiking the Gröna Bandet, a great resource to start with is the official website: Vita Gröna Bandet. This site provides detailed information about the trail, including maps, tips, and other essential resources. You can also connect with other hikers and find helpful advice for planning your journey. For additional support, consider reaching out to local outdoor gear shops like Backpackinglight.se for expert recommendations on equipment and preparation.

backpackingblogPhotographyTravel Photography

Hiking with camera gear

Bringing a camera

Fall and winter is the best time of year for photography on the trail. From all the autumn colors to the northern lights shining bright in the cloudless sky. I love Autumn for photography, and I would guess that the majority of my best pictures come from this time of year. My biggest problem with hiking ultralight, is bringing a camera – do I bring a full-frame? Perhaps a little compact camera? or more recently, maybe just my Iphone. However, in the autumn I am less concerned about ultralight, and more concerned with getting the best colors in my photos. I can’t stand sitting in front of a computer and spend hours editing photos, so I bring my full-frame in the autumn and focus on quality. 

The opening back panel on the F-stop gear backpacks is a great way to carry camera gear on the trail

Of course bringing a full-frame camera also has its own issues: How do I keep it dry? how do I carry it comfortably and so on. On my recent hiking trip to Borgafjäll here in northern Sweden, my Canon eos-r took a bath and got forever ruined. An expensive mistake. The lesson? Protect your camera, even if it has weather sealing. 

5 tips: 

If your more of a hard-core photographer, take a look at F-stop gear. These bags are proper hiking backpacks with solid frame and hip-belts, but also built specifically for bringing tons of camera gear. Hooks, pockets for filters, ICU (internal camera unit) and back panel entry, make these backpacks sublime for photography orientated hikers.

I personally use the F-stop ICU unit inside my HMG backpack. Works like a charm.

If your like me and think the F-stop bags might be a bit heavy for most use, use an ICU (internal case unit) inside your ultralight backpack. When I hiked Padjelanta trail last year with my Mamiya 7ii and a couple of lenses, I had an F-stop ICU inside my HMG windrider 4400. Worked great, not as easily accessible as using a F-stop backpacks, but certainly a good solution none-theless

An important factor in photography is to have your camera close. On the Sarek Ilforsen I designed this with photography in mind. I put two big d-rings in the shoulder straps – this was specifically to be able to hang a front pouch with a camera in, or to hang a camera directly. But strapping my camera on the front of my shoulder straps, I have the camera close to my eyes, and it has the added effect of balancing my entire pack for a better overall feel. 

Another tip here, not necessarily coupled with carrying your camera, but with being able to keep your lens clean. Bring a proper lens cloth! This happens to me from time to time that I forget to bring a small micro-cloth that can clean my lens. After a day of rain I have spots and smudge marks all over my lenses.


Having two big d-rings on the soulder straps is a great way to keep your camera close to your eyes.

Get out there! When I hiked Borgafjäll in September, I had no idea what the weather would be like. I didn’t care. I figured if I had clothes to keep me warm and dry, than I’d be good to go. As luck would have it the sun was shining and the clouds were clear – to my amazement, I woke up in the middle of the night, crawled out of my tent and was shocked by the incredible northern lights display that engulfed my entire field of view at the top of the mountain. I felt alone in the universe, in awe of the sights all around me. My point: Get out there if you want to get inspired. Sitting on your sofa dreaming of the perfect shot is not the way to get “the perfect shot”. 

What are your best tips for bringing proper Full-frame camera gear with you on a hike? let me know!

Kindly,

Kenneth Shaw

Check out more F-stop gear at https://backpackinglight.dk/brands/f-stop

backpackingLandscape photographyPhotographyTravel Photography

Hiking with the Mamiya 7ii

A friend and I recently took a 7 day, 165 kilometer walk in Northern Sweden. Starting at Ritsem and walking along the Padjelantaleden then moving off to Nordkalottleden and finishing in Kvikkjokk. This isnt going to be a post about the hike itself, but rather about my choice to bring the Mamiya 7ii +43mm lens and a ton of film. The film I used for this trip was varied but mainly Fuji Velvia 100 and Portra 160, 400. All film processed myself at home.

As some of you might know from previous post I have been an avid analog photographer (hobby) forever. I never went total digital as I always preferred the look of analog. On this particular trip I wanted to bring my analog camera as it had been years since I actually went hiking with an analog camera. Though, because I am a lightweight backpacking nerd, its hard to justify 2 kilos of extra gear that can only take still photos. While my total backpacking gear weight with food for the entire trip came in at 11kg, with the camera that pushed everything to just shy of 14kg.

It really was an internal debate for weeks whether or not I would bring the camera and what camera for that matter. In fact, just before boarding the train to northern sweden, I was still changing out my different pre-packed cameras and camera cubes in my backpack. My biggest issue was mainly with volume. While 14kg would not kill me, and I knew after a few days of eating the food weight in my backpack, my kit would be under 10 kg in no time. It was the volume of my pack that bothered me. I normally dont need more than a 40 liter backpack, however, with the mamiya and a packing cube I would need a 70 liter pack. This sucked.

However, while debating whether to bring my Ricoh GR21, Nikon F5, Canon f-1 or Mamiya 7ii, I ended on the only choice that would make any sense: the Mamiya 7ii. WIth its built in meter, super sharp lenses and lightweight, it was a no brainer. Though, I do regret not bringing my 150mm lens for the Mamiya, as 43mm is arguably to wide for most landscape applications. (for the kind of photos I take). This choice was mainly due to weight, one lens was enough.

To protect my camera I kept it in a Wandrd camera cube, in a plastic ziploc bag, the bag filled with these gel packs that keep moisture out. This seemed to work really well as I didnt have fog or moisture in my camera at all despite several days of hard rain. I did have a tripod, which I used both for video and for photography, my tripod weighed about 400grams and gives about 150cm of height.

In the end I think the extra weight and effort was worth it. Though I think had I brough my 150mm lens I would have gotten a lot more quality shots – as it was, I think its hard to capture the “vastness” of an area with such a wide lens that I brought. Wide lenses have a tendency to “squish” and area into a small frame, so even large alpine like mountains, look like little hills. Live and learn.

Anyway, here are a few more shots from the Mamiya 7ii + 43mm lens (I didnt bring viewfinder for 43mm lens as I find its not really necessary). Scanned with Silverfast and no additional editing

Landscape photographyPhotographyTravel PhotographyZambia

Life in Zambia

Some of you may not know, but since about mid February the family and I moved down to Zambia to adopt a beautiful little boy named Richard. Life here is certainly different, and having two son’s instead of one is also a big change. We live in Lusaka on the southern part of town in an area called Chalala. It’s a nice, quiet area of town that is rather close to the orphanage where Richard was living.

This hasn’t been a trip of wondering safaris and adventure. For the first month we only had permission to come by and visit Richard. So, everyday for a month we drove back and forth to visit Richard. Now, after two months we have full custody of Richard and he seems to really like being with us. We are now finally starting to be able to explore, unfortunately I am a bit out of action at the moment with a broken rib after falling hard on a slippery floor.

However we have made a few outings, with the most spectacular being Livingstone and Victoria falls. Livingstone is the town that hosts Victoria falls on the Zambian side of the border.

On the first day of being in Livingstone it was raining heavily – so instead of heading to Victoria falls we decided to do Musi-oa-Tunya national park for the day. It was an incredible journey where all the animals were out enjoying the rain. Giraffes, Elephants, Water buffalos and monkeys among many more.
There is an elephant there… I realise that my photography sinks a few notches when my family is with me. Perfectly natural I suppose.
Victoria falls from a distance.. Caught on the Canon 6d mark ii with 16-35 2.8 lens.. To say that the falls are impressive is an understatement.
This time a little closer – If you look closely we are drenched – it is not raining, this is from the mist of the falls. The bridge has a river of mist flowing and the entire hillside is like walking through a drowning shower on full blast.
Richard showing off how wet he is from the Victoria falls mist.
Alexander yells out at me “daddy look, take some pictures I’m going to pose…”
Looks perfectly safe.. ….. Zambia!
The minimum wage in Zambia is about 100 usd a month. While this won’t get you more than barely a candy bar in Sweden, in Zambia it’s enough to eat three meals a day on, have a home and cell phone. It’s not luxury, but it’s not death by starvation.
Walking down the street in livingstone
backpackingblogLandscape photographyPhoto reviewsPhotography

Camera gear over the years

Over the years I have gone through dozens of cameras. Different purposes, but mainly because I have a serious problem with GAS when it comes to cameras. I have become a freak with gear, much like backpacking gear, I go through gear until I find what works best for me in the variety of situations that I use my gear in. A quick run down follows:

1st camera and one I’ve used until about 2004 – Canon AE-1 Program with a 35-70mm zoom lens. While it quit being my daily camera in 2004, I actually still use it even today. It’s not really my camera, which is probably why I’ve never gotten rid of it. It’s officially my moms camera that she bought back in the early 80’s new. I have used that camera like crazy and love it. Unfortunately, film is not very practical for everyday use so I eventually went over to some Kodak digital camera that had an amazing 5 megapixel camera.

IMG_0296

I used that Kodak for a couple of years on my various trips to Australia, Thailand, Greece and Italy. I have a lot of pictures and video from that time, but, the quality is so bad I never got around to posting any of it. My photography lust cooled down a lot after that camera.. The pictures sucked, the video sucked.. the camera was boring..

Eventually I picked up my AE-1 Program again and started using it. My lust was reignited in 2012 when I bought a Sony NEX-7 then a Sony A7 Full frame and right after a Sony A7R. I liked the Sony cameras, and in a way they reignited my love for photography. Though they both seemed like unfinished masterpieces. Video was not great, lenses limited, software terrible, menu system lacking and with the Sony A7R it was nearly impossible to get sharp images handheld, on top of that, the Sony’s are extremely boring to use (I am used to the feel and look of the AE-1 Program which is rather fun). I also had a problem with the Sony business mantra of selling half finished products, and releasing just newer models every year. I traded my Sony A7R and Zeiss lens for a Fuji x-t1 with a few lenses. I loved the Fuji.

I used the Fuji on a few backpacking trips but found it to be a little on the heavy side and the video was still lacking. Fuji also started raising the prices of the lenses – they were getting heavier and more expensive than full frame lenses – and still are to this day. I upgraded to a X-T2 – though more of the same I thought. So I went over to an Olympus OMD EM-5 mark ii with a few lenses that I got really cheap, so I sold my Fuji and was perfectly happy with the OMD as it was better for video. IMO.. With a flipout screen, cheaper lenses, built in stabilization and in my opinion just as good if not better picture quality than the Fuji, I was more than happy to be an Olympus fanboy.

It was at this time I started to play around with video – last year, and this is when I realised that the Olympus was sorely lacking. With it’s less than optimal autofocusing and in non-perfect lighting conditions the video just looked terrible. And even in perfect lighting conditions with the most expensive lenses, video had artifacts and just all-around looked very amateurish. Don’t get me wrong, I am an amateur, but I figured there had to be better for the money.

IMG_0299

This is when I went over to a Canon M50, In general I have been against Canon, because it seemed to me that while everybody else was innovating and pushing the boundaries, Canon has a board room filled with monkeys stuck in the 80’s. Warren buffet once said “I buy companies that can be run by idiots, because eventually it will be.. ” this is where Canon is – a company run by idiots. However, the Canon M50 while being the worst camera on the market for so many things does a few things very good.

  1. Great video autofocus – it works no matter what
  2. Flip out screen
  3. Great colors from the camera – don’t have to color grade for my purposes
  4. Mic input
  5. Decent, cheap, light lenses.

Now I really like the M50 but it has a few things I don’t like that have made me sell it for my current camera a Canon 6D mark ii

  1. Lenses are not great
  2. Battery life is lacking
  3. Camera is boring to use
  4. Not weather sealed
  5. No depth of field
  6. Low light performance is horrific

Everybody bashes on the M50 because it does(nt) have 4k- or at least not useable. But who wants to edit 4k video?

Now I have landed on the Canon 6d mark II – This camera has the technology of the Sony a7 from 2013 – if not worse. It’s bad in just about everything – that is Canon at it’s finest – making horrific products that just barely glide by, then pay vloggers and reviews to give it exposure. No 4k, terrible 1080p video codec, bad slow mo, no dynamic range, not very good autofocus for pictures.. so on and so forth. Canon has literally just placed a shit sensor from an Canon 80D and decided to take double the price. It’s these kinds of decisions that will kill this company. The board room asses that know nothing about photography or video and thinks they are competing against cameras from 2010.  HOWEVER, there are things I like about this camera:

  1. I love the feel in my hands – the ergonomics and size is just right for a big guy like myself.
  2. Full frame – other than the Sony A7R, A7 and a few Leicas, I haven’t had FUll frame digital. I love the depth of field and quality of the video and images coming from the camera
  3. Weather sealed
  4. Great, cheap lenses – the EF system is ancient. Lenses are a steal right now as everybody knows Canon is sinking so they are jumping off the Titanic before it goes down – doesn’t make the glass any worse.
  5. Flip out screen
  6. Good 1080p for Youtube and internet videos
  7. Built in Timelapse mode – making completed timelapses in camera

That’s it.. That is why I have the Canon 6D mark ii and why I’m actually pretty happy with it.

Anyway, this is just the run-down of my main camera systems that i have used over the years. I have gone through quite a few Compact cameras as well as Film cameras.

At the moment my film camera of choice is a Ricoh GR21 (a fantastic 200 gram compact camera with an amazing 21mm wide angle lens) – This camera is a beast that takes extremely sharp pictures. A lot of fun for street photography – discrete, wide and sharp

IMG_0303

My preferred compact camera is the Canon G7x mark ii. Yes it does basically everything worse than the Sony Rx100 series – all of which I have used a lot over the years. But, it has better colors right out of the camera which means a lot to me.

backpackingblogcampingLandscape photographyPhotography

Pictures from Borgarfjäll

I recently had an outing with a few friends here in northern Sweden up in the Borgarfjäll mountains, about 350 kilometers inland from Umeå. This was the very reason I moved back to Northern Sweden: To get to the mountains! This was a fun trip, and more in line with car camping perhaps than a rough tumble through the wilds of Sweden, but I had fun non-the less.. In fact, there is something to be said about parking the car outside a mountain top, summiting, sleeping over, fishing and coming back down again. I was out a total of two nights and it was well worth the drive.

This trip also gave me the chance to test my Sierra designs Cloud sleeping bag/quilt and using my Samsung 9+ for all video and photography before taking my planned longer fall trips. Video coming eventually…..

20180914_182655

The view from Buarkantjahke at about 700 meters

20180914_182701

20180914_193452

A lot can be said about the Zpacks Duplex – but there are two that define it most: Light and Cold. What you gain in weight, you sacrifice in size and “tightness”. This is a payoff usually worth the cost, but in cold, fall conditions the Duplex should be changed out for tents better situated for these conditions.

20180915_090506.jpg

The Zpacks and Hilleberg Allak side by side.. both did just fine in the mountains – though the Allak weighs about 2kg more.

20180915_103302

My favorite pack: the Hyperlite mountain gear windrider 2400. A great combination or weight, robustness, usability and looks.

20180915_104058

Me

20180915_10430220180915_110830

David finding loads of chanterelle mushrooms – we filled up several plastic bags with mushrooms.

20180915_133429

The view by Saxån overlooking Buarkantjahke mountain. 1235 meter peak and were we camped the night before at around 900meters.

20180915_183950

On the way back from Borgafjäll I walked a few kilometers along Lögdeälven and camped right by the water

20180915_19113420180916_092055

Down by Öreälven

blogPhotographyTravel PhotographyVideo

My return to the USA – culture shock and family reunion

Spent this last Christmas and new year with my brother and his family in Ozark, Alabama – together with our parents.. This is the first time we have all come together an had Christmas together, and the first time in 20 or so years since my parents, my brother and myself have spent Christmas together. Anyway, I had a great time, and as always I have mixed emotions about my homeland: I love the fact that parking is free in a lot of places, public toilets are generally everywhere and not to mention a lot of great places to eat and shop. I am however heart broken about many things, signs of a fallen nation just waiting to crumble, a populace that willingly accepts it’s dumbing down by a broken news media and a willful ignorance to find out the truth. George Orwell once coined the term “double think” – Doublethink is the act of simultaneously accepting two mutually contradictory beliefs as correct. This couldn’t be more true when talking about politics with people.

There is another term that unfortunately is lost on me now, but the idea is that it takes an incredible amount of intelligence to realize you don’t understand something. Often, the least understanding individuals are the ones that will argue loudest for the ideas or concepts they don’t understand – and not realize they don’t understand.  I find this prevalent beyond belief, not only doublethink and the willful ignorance associated with that, but also the complete lack of understanding for general ideas – which often leads to pointless discussion on subjects that I may have studied for years and have a general understanding of, and find myself in the middle of discussion with people who obviously have no clue. Simple facts that are easy to prove or disapprove are simply ignored, often ideas of conspiracy are preferred over simple explanations; in the world of modern USA 2+2 does not equal 4. 2+2 is equal to whatever and whomever decides to argue the loudest.

Ideas that once could be expressed and a discussion could take place existed in a not too distant past, today I can be called a nazi and a snowflake in the same discussion with no thought or mental process from the accuser being apparent. Names and terms have become a kind of acceptable replacement for rational thought and discussion. I think these terms are crutches for the conversational cripple and it says more about the accuser than the accused.

In discussions people will simply refer me to look up the “facts” on Alternet, PragerU or Breitbart, Alex jones, or whatever Trump decides to vomit up as his latest wisdom. (disclaimer: I’m not generally for or against Trump. If he does something good I acknowledge it, if he does something shitty, I say it.) I was left with the feeling that there is no going back, when simple conventions and truths that society are built on are simply ignored, it creates an unnatural conflict, an unwillingness to change and learn. The radicalism that I have simply seen online was put on display in so many ways. I don’t just mean left wing radicalism, but also right wing. It’s all there, it’s not only online, it’s right there, just beneath the surface in everyday situations with real people.

Simply put, I believe it’s going to get a lot worse before it gets better – and there is no guarantee that it will get better. 

With that said, in general I love the people, the workers the survivors: because if nothing else can be said about the USA, one thing is certain, Americans are survivors. Life is not easy in the USA, the reality of working two full time jobs and still not make ends meet, is very real, and you see it everywhere. I sat down with my family to eat at Wendys, my son started playing with another kid who I thought was sitting with his family, then his “family” left him there, alone. Well, turns out his mother was working, at Wendys. These are the people the media likes to call “welfare queens”. Working their asses off, surviving, hustling and just trying to get by.


Video filmed on DJI Spark drone and Olympus OMD EM5 II

In any case, I have put together a few pictures and so far one video here from my trip to Ozark, Alabama and a couple days along the Florida coast in Panama city and Pensicola.

blogLandscape photographyPhotographysarek

Sarek i Bilder (in pictures) – Part 1

My schedule is filled at the moment while trying to get Backpackinglight.se up and running. So instead of a long trail report, I will post some pictures! More pictures coming soon.

DSC06408
Mukka Stugan is a small little emergency cottage that while offers a nice place to eat lunch while it’s raining, has unfortuantely become a trash can for hikers who can’t be bothered to bring their trash with them.

DSC06344

The Trailstar by the glacier river.

DSC06368
13 kilos for a 9 day trip – fully safe and secure with a fishing pole and satellite phone to boot. My packing is watertight, I’m set for far below zero temperatures if needed.

DSC06267DSC06388DSC06411DSC06541

Dinner!

DSC06478
Taking a coffee and candy break while drying out my shoes.

DSC06492
It looks like hell, but believe me, this is some of the best aspects of wearing trailshoes in the wild. When my feet get hot I can just go trudging through some cold water. No blisters, no pain, no problems! Trailshoes are a luxury few have yet discovered.

DSC06515

Down by Rapadalen – Amazing

DSC06546
If only Ron would let me sell his MLD gear! The yellow trailstar is probably the single most beautiful tent build today. An incredibly light and well performing piece of kit.

DSC06882
My Fizan poles and HMG windrider 4400 after a week in Sarek. Both performed incredibly well – so good in fact that I will be supplying both at backpackinglight.se. These are simply the best products available for their intended purpose.

backpackingblogGear listPhotographyultralight backpacking

My camera gear for Sarek 2017

I find that I absolutely love video diaries of backpacking.. I have been following and watching them for years on YouTube, but I never really got around to doing it myself. I’ve tried a few times on a smaller scale, but never any real effort. My YouTube channel I don’t even bother marketing and in general I’m not very active on there. I’m not sure why this is to be honest, i guess I just couldn’t figure out how to make it work in practice while holding onto my ultralight philosophy. As well as being stuck on just doing gear reviews, which honestly, is a chore. On top of that I’m not really a computer guy – I don’t like editing video or photography and making an interesting video out of hours and hours of footage is no easy task.

With that said, because I love the format of video documentaries, I am going to start working on it more and more. I am changing up my camera gear for my upcoming trips along the High coast trail in northern Sweden and my two weeks through Sarek journey. My strategy is simple: Record everything! I found out the hard way that it’s damn difficult to make an interesting movie with limited footage. I have been editing my Iceland video now and realize that I hardly recorded anything at all, so as an embarrassment to myself and to the suffrage of everyone watching my videos, I do a 2 minute intro where I’m just describing what was happening… In any case, it kind of works, but would have been better to show instead of tell.

A link to the video: Alone in Iceland part 1.

This means that my Fujifilm x-t2 camera and lenses have been sold to make room for video gear and after my Iceland trip, I’m convinced a pocket camera works wonders for what I do. So some of the gear that my Fujifilm x-t2 has financed so far are as follows:

Gopro hero 3 black edition with accessories – used cost about 150USD (200 grams)
Ricoh GR – An excellent digital compact camera that I absolutely love 200USD (245 grams)

ricoh-gr-front
I used the Sony RX100 in Iceland, however I find the Ricoh GR to be a completely different beast altogether with regards to picture quality

DJI Spark drone and controller with two extra batteries 1000USD (550 grams complete)

dji-spark-white-hover
The DJI Spark is a tiny drone with serious power

To top it all off I have two 20100mhv battery packs to keep everything charged along the way.

I’ve sold all my Fuji gear for around 2400USD

Total weight for my new photography and video gear = 1095grams
Total weight of Fujifilm x-t2 with lenses and batteries = 1114grams

Weight of battery packs 490grams each (added one for the drone)

Total weight increase for new system: 300grams

Total money savings: around 1000usd

I can live with a total weight increase of 300grams for so much more flexibility and control. The Ricoh GR works fantastic for me as almost all my photography in the wild is at 28mm, no matter what lenses and cameras I have with me – my shots are always wide. and now I have true video capabilities.

Concerns about drones: I got some feedback with regards to bringing a drone with me or drones in general. It seems to be a very hot topic in the USA and something I hadn’t thought about before as drones have never bothered me personally. I will call it the “road rage syndrome”, there are people who have an incredible amount of pent up rage and are looking for something to go bezerk over and I have to take this into consideration when flying the spark.

To the advantage of the spark it is tiny, unobtrusive and quiet. With that said I think drones should fall somewhere between loud music in camp and deficating on the trail.  Neither of these should be practiced, and with proper fore thought and consideration for others, can easily be avoided.

My strategy for succeeding with video:
Record everything! Better to record days and days of video and edit down to a highly interesting 30 minute clip, than to take minimal video and try and stretch it out.

I also need to work on my editing skills. I don’t like working on computers that much, so I will have to find presets and styles that I like so I can get my editing done quickly. I also know what kind of footage I like – So I will try to emulate this.

Where it could possibly fail:
I like to keep things simple, sometimes it’s a hassle to record. To always have to think about the shot. To pull out a drone and start recording takes me out of the moment. hopefully I can overcome this, as I find I really love the video format, and I love watching my old videos of all the hikes I’ve done. (sadly I have barely edited any of them… so nothing is on youtube yet)


GearPhoto reviewsPhotography

My favorite backpacking cameras

Through the years I have used many cameras on the trail, and several of them I have written reviews on. I thought for fun I would include a few pictures and a few of my favorites here. I know what your thinking, it’s not the gear that makes the photographer, and it’s absolutely correct, but it sure does help to have quality gear that inspires. You will notice I don’t put any importance on year the camera was made, I do this because I don’t really care. I love the Sony rx100, is it as good as the rx100 m4? probably not, but I wouldn’t know as I haven’t owned the m4. I have owned the m3 and I thought it too was an excellent backpacking camera. Anyway, here are my personal favorites:


Fujifilm X-T1

OLYMPUS DIGITAL CAMERA

It’s hard not to love this camera. It takes amazing pictures, the XF lenses are the best lenses on the market, and to top it off because of the release of the X-T2, the X-T1’s are relatively cheap now. The fujifilm with the 18-55 kit lens is a fantastic backpacking combination that weighs around 800 grams total.  16mp sensor.


Fujifilm X100s

$_32

Super crisp pictures and a set focal length of 35mm. What’s not to like. Missing the classic chrome film simulation mode and not really the best for video. However, an excellent backpacking camera. weighs 430 grams and 16mp sensor.


Sony RX100

121031_sonycybershot_003-660x440

Small, light and excellent sensor. I used the sony RX 100 on my solo trip in Iceland and don’t regret a thing. Perhaps not the best quality when compared to Fuji, but still an excellent all around compact camera. 245 grams and 28-100mm lens and 20mp sensor. These can now be purchased relatively cheap on the classifieds.


Sony RX100 m3

Z-SONY-RX100M3-FL-EVF-FLASH-L

Everything I love about the sony RX100 the M3 does better. The lens is criper, the files are cleaner, the sensor is better and the Sony RX 100 M3 even has a built in viewfinder and HD video. Only negative? 24-70mm lens is perhaps less flexible than the 28-100 on the Rx 100.


Ricoh GR

ZYFRONT-LG

Small, light, excellent pictures and sensor… what’s not to like? Some people don’t like single focal length cameras, personally they are my favorite. I hate having to think about what lens might work best for a certain situation. Why bother? The 28mm lens on the Ricoh GR is one of the best on the market. Excellent for both backpacking and street photography. The Ricoh GR weighs 245 grams with battery and has a 16mp sensor.


Fujifilm X-T2

IMG_7566-acr

The Fufilm X-T2 is no simple upgrade. It’s basically a completely new camera as compared to the X-T2. Sensor upgrade to a new Xtrans 24megapixel, two memory cards, autobracket for HDR and 4K video to name just a few of the upgrades. The downside of course being that a X-T2 will cost you twice as much as the X-T1 at the moment. But like all the Fujifilm cameras, the X-T2 is probably the best mirrorless camera on the market and easily competes with most full frames. The weight is similar to the X-T1 at 450 grams with battery.


Runner up:
Sony A7R

Small body, clunky lenses and massive files that takes days to transfer to computer.. Excellent picture quality but a bore to use. Some of my best pictures have been taken with the A7R, but I can’t recommend the camera as for every one excellent picture 10 are bad. Why? because the shutter causes vibrations in the photo making sharp pictures handheld very difficult.